
Your living room is the heart of your home—the place where family gathers, guests are entertained, and relaxation takes center stage. But let’s be honest: between daily life, unexpected messes, and that ever-growing pile of throw blankets, keeping it spotless can feel overwhelming.
What if you had a foolproof system to keep your living room effortlessly clean—without spending hours scrubbing? Following a structured routine—like the expert-backed weekly approach outlined by Southern Living—can make maintaining your space feel far more manageable and less time-consuming.
This step-by-step Living Room Cleaning Checklist is designed to make tidying up easy and stress-free. Whether you need a quick 15-minute refresh, a deep seasonal clean, or simple daily, weekly, and monthly habits to maintain a fresh and inviting space, we’ve got you covered. Plus, we’re sharing expert-approved cleaning hacks to save you time and effort.
By the time you finish reading, you’ll have a clear, manageable routine to keep your living room looking its best—without sacrificing your weekends to cleaning. Let’s dive in!
Table of Contents
- Key Takeaways
- Why a Living Room Cleaning Checklist Matters
- Living Room Cleaning Supplies You’ll Need
- Daily Living Room Cleaning Checklist
- Weekly Living Room Cleaning Checklist
- Monthly Living Room Cleaning Checklist
- Seasonal Living Room Cleaning Checklist
- How to Speed Clean Your Living Room in 15 Minutes
- Living Room Cleaning Hacks and Tips
- Conclusion
- Frequently Asked Questions
- Check Out Our Recent Articles:
- Related Posts
Key Takeaways
Why a Living Room Cleaning Checklist Matters
A well-organized cleaning checklist helps you stay on top of your living room maintenance without feeling overwhelmed. When you’re juggling work, family, and social commitments, having a structured approach to cleaning ensures you won’t miss important tasks that keep your living space inviting and comfortable.
Your living room cleaning checklist serves as a reliable roadmap, breaking down what could be an intimidating task into manageable steps. It’s especially helpful when you’re sharing cleaning responsibilities with family members or roommates, as everyone can follow the same consistent routine. You’ll find that maintaining a checklist reduces cleanup time and eliminates the guesswork about what needs to be done next.
With a systematic approach, you’re more likely to tackle often-forgotten areas like baseboards, light fixtures, and behind furniture. Your checklist also helps you track both daily quick-fixes and deeper cleaning tasks that need attention less frequently. By following a living room cleaning checklist, you’ll create a more organized, healthier space where you and your loved ones can relax and enjoy time together without the distraction of visible dust, clutter, or dirt.
Living Room Cleaning Supplies You’ll Need
Before you dive into cleaning, having the right supplies on hand can make all the difference. The right tools don’t just make cleaning easier—they help you clean faster, more effectively, and with less effort.
Whether you’re tackling everyday dust, deep-cleaning upholstery, or refreshing surfaces naturally, this checklist covers everything you need to keep your living room spotless. From essential tools like vacuums and dusters to eco-friendly cleaning solutions and specialized products for stubborn stains, we’ll help you build the perfect cleaning kit.
Stock up on these must-haves, and you’ll be ready to tackle any mess—quickly, efficiently, and with professional-level results
Essential Cleaning Tools (vacuum, mop, duster, etc.)
You’ll want to equip yourself with these essential items to clean your living room thoroughly and efficiently before your living room cleaning routine.
| Tool | Purpose |
|---|---|
| Vacuum Cleaner | Remove dirt from carpets, rugs, and hard floors |
| Microfiber Duster | Capture dust from surfaces and hard-to-reach areas |
| Microfiber Cloths | Wipe down surfaces and polish furniture |
| All-Purpose Cleaner | Clean various surfaces and remove stains |
| Mop | Clean hard floors and remove stubborn dirt |
Natural Cleaning Products (vinegar, baking soda, etc.)

Natural cleaning products offer an eco-friendly and cost-effective alternative to commercial cleaners while being just as effective for your living room maintenance routine. You’ll find most of these ingredients already in your kitchen, making it easy to clean living rooms without harsh chemicals.
White vinegar mixed with equal parts water creates an excellent all-purpose cleaner for windows, mirrors, and hard surfaces. Pour this solution into a spray bottle and use it to remove fingerprints and dust from coffee tables, side tables, and entertainment centers. For stubborn stains on upholstery, sprinkle baking soda over the affected area, let it sit for 15 minutes, then vacuum it up.
Lemon juice works wonders on wooden furniture – mix it with olive oil to create a natural polish that removes scratches and restores shine. For refreshing carpets and fabric surfaces, combine baking soda with a few drops of essential oils like lavender or tea tree. You can also create an effective glass cleaner by mixing two tablespoons of cornstarch with vinegar and water, leaving your windows and mirrors streak-free and sparkling clean.
Specialized Supplies (upholstery cleaner, microfiber cloths, etc.)

The essential specialized supplies for living room cleaning ensure you’ll tackle every surface effectively. When learning how to clean a living room properly, you’ll need specific tools designed for different materials and textures. Your upholstery cleaner should be compatible with your furniture’s fabric, while microfiber cloths prevent scratches on delicate surfaces and trap dust efficiently.
- An upholstery cleaning machine or fabric-specific cleaner for your sofa and chairs – this helps remove deep-set stains and refreshes the material without damaging it
- A set of color-coded microfiber cloths – designate specific colors for different surfaces (like blue for glass and yellow for wood) to prevent cross-contamination
- A telescopic duster or extendable cleaning tool – reaches high corners, ceiling fans, and tops of curtains without requiring a ladder
Don’t forget to stock up on furniture polish appropriate for your wood pieces and glass cleaner for mirrors and windows. You’ll also want to keep a supply of vacuum attachments handy for different surfaces – the crevice tool works wonders for baseboards and corners, while the upholstery attachment safely cleans fabric surfaces.
Daily Living Room Cleaning Checklist
A clean and tidy living room doesn’t happen by accident—it’s the result of small, consistent habits that prevent mess from piling up. The good news? You don’t need hours to keep your space looking fresh!
Make this checklist part of your daily routine, and you’ll always walk into a living room that feels clean, cozy, and guest-ready.
Declutter Surfaces and Floors

Removing everyday clutter should be your first step in maintaining a tidy living room. When you’re cleaning living room spaces, focus on gathering items that don’t belong and returning them to their proper homes. You’ll find that dealing with clutter first makes the rest of your cleaning tasks much more manageable and efficient.
Start by scanning your living room surfaces and floors for items that have accumulated throughout the day. Look for things like:
- Remote controls, magazines, and newspapers that need to be organized or stored
- Empty cups, plates, and snack wrappers that should go to the kitchen
- Toys, shoes, and personal items that belong in other rooms
Once you’ve cleared the clutter, you’ll immediately notice how much more spacious your living room feels. Make it a habit to place items back where they belong right after using them, rather than letting them pile up. This simple practice will save you time during your daily cleaning routine and help maintain an inviting space that you and your family can truly enjoy. Remember, a clutter-free environment creates a more relaxing atmosphere for everyone.
Straighten Pillows and Fold Blankets

After clearing away clutter, making your living room look polished comes down to addressing soft furnishings. Start by giving your throw pillows a gentle fluff and chop to restore their shape. Arrange them symmetrically on your sofa, positioning larger pillows in the back and smaller ones in front. You’ll want to ensure they’re standing upright rather than slouching to maintain that magazine-worthy appearance.
Next, tackle any throws or blankets that have been left in disarray. Fold each blanket neatly using the thirds method: lay it flat, fold both sides toward the center, then fold it again into thirds. This creates a uniform, boutique-style presentation that looks intentional rather than messy. If you’re short on time, a simple rectangle fold will do – just make sure the edges align neatly.
Place your folded blankets either draped over the arm of your sofa, arranged in a decorative basket, or stacked on an ottoman. For frequently used blankets, try the classic diagonal drape across the corner of your couch – it’s both stylish and functional, keeping comfort within easy reach while maintaining a tidy appearance.
Dust Furniture and Surfaces

Regular dusting forms the foundation of a pristine living room. You’ll want to tackle this task systematically, working from top to bottom and left to right, so you don’t miss any spots or redistribute dust onto already-cleaned surfaces. Using a microfiber cloth or duster, pay special attention to your entertainment center, coffee tables, side tables, and any decorative pieces that tend to collect dust.
Don’t forget these often-overlooked spots that need regular dusting:
- Window sills, blinds, and curtain rods where dust quietly accumulates
- Picture frames, mirrors, and wall décor that can develop a subtle film
- Electronics and their surrounding areas, including TV screens and game consoles
For the best results, slightly dampen your microfiber cloth to help trap dust instead of dispersing it into the air. If you’re dealing with delicate items or electronics, keep the cloth dry to prevent damage. Remember to lift objects rather than dusting around them – this includes lamps, vases, and photo frames. When you’re finished, give your cloth a good shake outside or wash it to prevent spreading dust the next time you clean.
Vacuum High-Traffic Areas

Once you’ve handled the dust up high, it’s time to focus on the floor beneath your feet. High-traffic areas in your living room, like the paths between furniture and doorways, collect dirt, crumbs, and debris faster than other spots. Daily vacuuming of these zones keeps your space fresh and prevents dirt from being ground into your carpeting or rugs.
Start at the room’s main entrance and work your way through the natural walking paths. Pay special attention to areas around sofas, coffee tables, and entertainment centers where family members frequently gather. Make several slow passes with your vacuum in different directions to effectively lift embedded dirt and pet hair.
Don’t forget the corners and edges where your regular vacuum path might miss. Use your vacuum’s attachments to reach under furniture and along baseboards. For homes with pets or kids, you’ll want to focus extra attention on areas where they play or rest. Keep in mind that regular vacuuming not only maintains appearance but also extends the life of your carpeting and prevents allergens from building up in your living space.
Weekly Living Room Cleaning Checklist
Even with daily tidying, some areas of your living room need extra attention to stay truly fresh. Dust settles on decor, fingerprints smudge screens, and floors collect hidden dirt over time. That’s where a weekly deep clean comes in!
Set aside a little time once a week, and you’ll enjoy a brighter, cleaner space—without letting dirt and dust build up.
Dust Art, Photographs, and Decor

Dusting artwork, photographs, and decorative items requires careful attention to protect cherished pieces while maintaining their visual appeal. When you’re cleaning these delicate items, it’s important to use the right tools and techniques to prevent damage while effectively removing dust and debris. Your home’s decorative elements tell your story and create a welcoming atmosphere, so proper care will help preserve these meaningful pieces for years to come.
To dust your art and decor safely and effectively, follow these essential steps:
- Use a microfiber cloth or specialized art duster instead of feather dusters, which can scratch surfaces or leave behind particles. Work from top to bottom, being especially gentle with fragile items.
- Remove photographs and artwork from walls once a month to clean behind them and check for any moisture damage or fading. While they’re down, clean the frames with appropriate materials based on their composition.
- Pay special attention to textured decorative items, using compressed air to remove dust from intricate details. For delicate pieces, consider using a clean, soft-bristled makeup brush to reach crevices without causing damage.
Sanitize the Television and Remote Controls

Electronics in the living room harbor an alarming amount of bacteria, making regular sanitization of televisions and remote controls essential for a healthy home. Just like other families who prioritize cleanliness, you’ll want to make this task part of your weekly routine to protect your household from germs.
Start by unplugging your TV and letting it cool completely. Using a microfiber cloth slightly dampened with an electronics-safe cleaner, gently wipe the screen from top to bottom. Don’t spray cleaners directly onto the screen, as liquid can seep into the components and cause damage. Clean the TV’s frame, stand, and back panel, being careful around ventilation areas.
For remote controls, remove the batteries first. Create a cleaning solution using equal parts water and isopropyl alcohol. Dip a cotton swab in the solution and clean between the buttons, where dirt and oils accumulate. Wipe the entire remote with a microfiber cloth dampened with the same solution. Pay special attention to the most frequently touched buttons. Let everything dry completely before replacing batteries and plugging the TV back in.
Sweep and Mop the Floor

After tackling surfaces up high, it’s time to focus on the foundation of your living room – the floor. You’ll want to start by removing any items that are sitting on the floor, including throw rugs, footstools, and toys. This creates a clear workspace and ensures you won’t miss any spots during cleaning.
Begin by thoroughly sweeping or vacuuming to remove loose dirt, dust, and debris. Pay special attention to corners and areas under furniture where dust bunnies love to hide. Once you’ve collected all the loose particles, prepare your mopping solution according to the manufacturer’s instructions for your specific floor type.
When you’re ready to mop, remember these essential tips:
- Start from the farthest corner of the room and work your way toward the exit to avoid stepping on clean areas
- Use a figure-eight motion while mopping to effectively lift dirt without leaving streaks
- Change your mop water when it becomes visibly dirty to prevent spreading grime
Allow the floor to dry completely before replacing furniture and rugs. For optimal results, you’ll want to tackle this task weekly to maintain your living room’s fresh, clean appearance.
Clean Windows and Mirrors

Brilliance starts with crystal-clear windows and spotless mirrors in your living room. To achieve that professional shine, you’ll need a microfiber cloth, glass cleaner, and newspaper or lint-free paper towels. Start by removing dust from the surfaces with a dry microfiber cloth to prevent smearing when you apply the cleaner.
Spray your glass cleaner evenly across the window or mirror’s surface, but don’t oversaturate. Working from top to bottom, wipe in a Z-pattern to prevent streaks and ensure you’re not missing any spots. For stubborn marks, apply a bit more pressure and use circular motions. Don’t forget the corners and edges where grime often accumulates.
For the finishing touch, use crumpled newspaper or lint-free paper towels to buff the surface to a streak-free shine. If you notice any remaining streaks, they’re likely on the opposite side of the glass – so remember to clean both sides of your windows. Pay special attention to areas where sunlight directly hits, as these spots tend to show smudges and imperfections more clearly. Your newly sparkling windows and mirrors will instantly brighten your living space and make the room feel more open.
Monthly Living Room Cleaning Checklist
Even with daily and weekly cleaning, some messes build up over time. Dust settles on ceiling fans, upholstery absorbs everyday wear, and carpets hold onto dirt you don’t even notice—until you do. That’s why a monthly deep clean is key to keeping your living room looking and feeling its best.
If you want to thank yourself later, you have to set aside some time everymonth to give your living room the attention it deserves. Let’s look into it!
Dust Light Fixtures and Ceiling Fans

Light fixtures and ceiling fans serve as dust magnets in your living room, collecting layers of debris that can diminish their effectiveness and appearance. You’ll want to tackle this cleaning task monthly to maintain optimal lighting and air circulation while preventing dust from spreading throughout your space.
To effectively clean your light fixtures and ceiling fans, you’ll need a sturdy stepladder, an extendable duster, and microfiber cloths. Before starting, turn off all lights and fans, allowing bulbs to cool completely. For safety, ensure your ladder is positioned on a stable surface, and never overreach.
Here’s what you’ll need to focus on:
- For ceiling fans, use an extendable duster with a U-shaped attachment to clean both sides of each blade, working from the center outward
- Wipe light fixture covers and bulbs with a slightly damp microfiber cloth, being careful not to let water seep into electrical components
- Don’t forget to dust chain links, pull cords, and mounting hardware, as these areas often get overlooked
Once you’ve finished, run your ceiling fan briefly to ensure it’s properly balanced and free of any remaining dust particles.
Deep Clean Upholstery and Cushions

Upholstered furniture demands regular deep cleaning to remove accumulated dirt, oils, and allergens that standard vacuuming can’t reach. To begin, remove all cushions and pillows from your furniture, and vacuum every surface thoroughly using your upholstery attachment. Don’t forget to clean beneath the cushions and along seams where debris often collects.
Check your furniture’s care labels to determine the appropriate cleaning method. For water-safe fabrics, mix a gentle upholstery cleaner with warm water, or create your own solution using mild dish soap. Test the cleaning solution on a hidden spot first. Using a soft brush, work the cleaner into the fabric with circular motions, being careful not to oversaturate the material. Pay special attention to visible stains and high-use areas.
For cushions, use your vacuum’s upholstery attachment on both sides, then spot clean as needed. If they’re machine washable, follow the care instructions carefully. Allow all upholstery and cushions to dry completely before replacing them. For delicate or specialty fabrics like silk or leather, you’ll want to consult a professional cleaner to avoid damage and maintain your furniture’s longevity.
Clean Curtains, Blinds, and Drapes

While your upholstered furniture attracts dust and debris at ground level, window treatments face similar challenges from both indoor and outdoor elements. Dust, pollen, and even cooking residue can accumulate on your curtains, blinds, and drapes, making regular cleaning essential for maintaining a fresh and inviting living room.
For fabric window treatments, you’ll want to check the care labels first. Most curtains and drapes can be machine washed or dry cleaned, but some may require special handling. When it comes to blinds, whether they’re wooden, vinyl, or metal, a thorough dusting followed by gentle cleaning with appropriate solutions will keep them looking their best.
- For venetian blinds, use a microfiber cloth or duster between each slat, working from top to bottom and closing the blinds in both directions to ensure complete coverage
- Clean fabric curtains and drapes according to their care labels, typically every 3-6 months, or more frequently if you have allergies or pets
- For delicate or intricate drapes, consider professional cleaning services to avoid damage and ensure proper handling
Remember to vacuum the window sills and tracks while you’re cleaning your window treatments to prevent dust from immediately settling back onto clean surfaces.
Wash Rugs and Carpets

Rugs and carpets trap dirt, allergens, and debris throughout the month, creating unseen layers of grime beneath your feet. To maintain a fresh, welcoming living room, you’ll need to thoroughly clean these floor coverings regularly.
Start by removing all furniture from your rugs and vacuuming both sides thoroughly. For area rugs, take them outside and beat them vigorously to release trapped dirt. If your carpet is wall-to-wall, focus on using your vacuum’s attachments to reach corners and edges where debris accumulates.
For deep cleaning, you’ve got options. Rent a carpet cleaning machine from your local hardware store, or use a professional service for annual deep cleans. If you’re handling it yourself, pre-treat any visible stains with an appropriate cleaning solution, then follow the machine’s instructions carefully. Don’t oversaturate the carpet, as excess moisture can lead to mold growth.
For smaller rugs, check the care label – many can be machine washed or hand washed with mild detergent. Always let rugs dry completely before returning them to your living room, and consider rotating them periodically to ensure even wear patterns.
Polish Furniture and Shelves

Once your floors are fresh and clean, your attention should turn to the wooden surfaces that define your living room’s character. Your furniture and shelves deserve regular polishing to maintain their beauty and extend their lifespan. Start by removing all items from shelves and tabletops, then wipe away dust with a microfiber cloth. Don’t forget to clean underneath decorative objects and in hard-to-reach corners.
For the best results when polishing your wooden furniture, follow these essential steps:
- Use a high-quality wood polish that’s appropriate for your furniture’s finish – test it on a small, hidden area first to ensure compatibility
- Apply polish in the direction of the wood grain using soft, lint-free cloths, and avoid oversaturating the surface
- Pay special attention to high-touch areas like armrests and table edges, where oils from hands can accumulate
Remember to polish both exposed and hidden surfaces, including the backs of furniture and undersides of shelves. Once you’ve finished polishing, allow surfaces to dry completely before replacing décor items. Your newly polished furniture will add warmth and shine to your living space, making it more inviting for family and guests.
Seasonal Living Room Cleaning Checklist
As the seasons change, so do the cleaning needs of your living room. Dust, allergens, and clutter build up over time, and a deep seasonal clean is the perfect way to refresh your space and keep it looking its best all year long.
Set aside time each season to give your space a thorough refresh—you’ll enjoy a healthier, more inviting home no matter the time of year. Let’s dive in!
Clean and Rotate Rugs
A living room’s rugs endure constant foot traffic and collect substantial dirt throughout each season. You’ll want to clean and rotate your rugs every three to four months to ensure even wear and extend their lifespan. Start by taking your rugs outside and giving them a thorough shake to remove loose dirt and debris.
For a deeper clean, you’ll need to address both sides of your rugs. Vacuum the top surface thoroughly, working in overlapping rows to capture embedded dirt. Don’t forget to vacuum the underside as well, where dust and debris can accumulate.
- Use a carpet cleaner or steam cleaner for deep-set stains, following the manufacturer’s instructions for your specific rug material
- Rotate your rugs 180 degrees to distribute wear patterns evenly, especially in high-traffic areas
- Allow rugs to dry completely before returning them to your living room to prevent mold and mildew
Once you’ve finished cleaning, consider applying a fabric protector to help repel future stains and dirt. Remember to check your rug’s care label before using any cleaning products, as some materials require special treatment or professional cleaning.
Deep Clean Baseboards and Walls

Moving up from floor level, baseboards and walls often go unnoticed during regular cleaning routines but accumulate significant dust, scuff marks, and grime over time. You’ll want to tackle this task every few months to maintain your living room’s pristine appearance and prevent buildup that’s harder to remove later.
| Area | Cleaning Method | Tools Needed |
|---|---|---|
| Baseboards | Dust, then wipe with warm soapy water | Microfiber cloth, bucket, gentle cleaner |
| Lower Walls | Spot clean scuffs, dust with extension duster | Magic eraser, extendable duster |
| Mid Walls | Wipe down with all-purpose cleaner | Soft sponge, cleaning solution |
| Upper Walls | Check for cobwebs, dust corners | Extended duster, step stool |
| Crown Molding | Gentle dusting, spot cleaning | Microfiber duster, ladder |
Start at one corner of your room and work methodically around the space. You’ll need to get down on your knees for baseboards, so wear knee pads or use a cushion for comfort. For walls, work from bottom to top to prevent drips and streaks. Don’t forget to test your cleaning solution on an inconspicuous area first, and remember to dry surfaces thoroughly to prevent water damage.
Reorganize Bookshelves and Cabinets

Organization transforms cluttered bookshelves and cabinets into functional, attractive living room features. Start by removing everything from your shelves and cabinets, then sort items into keep, donate, and discard piles. Wipe down all surfaces with a microfiber cloth and appropriate cleaner before replacing items.
When reorganizing your shelves, consider both aesthetics and practicality. Group similar items together and arrange books by genre, size, or color to create visual interest. Don’t forget to leave some open spaces to prevent a crowded look and allow room for future additions.
Make your shelving displays more engaging by incorporating these design principles:
- Create depth by placing larger items in the back and smaller ones in front
- Mix horizontal and vertical stacking to add visual rhythm
- Include decorative objects like vases, frames, or plants between book groupings
Keep frequently used items at eye level in your cabinets, and store seasonal or rarely used pieces in higher or lower spaces. Consider using shelf organizers or baskets to contain smaller items and maintain order. Label storage containers to make finding specific items easier and encourage family members to maintain the new system.
Check and Replace Air Vents and Filters

While organized shelves keep your living room looking fresh, clean air vents and filters maintain the room’s air quality and comfort. It’s essential to regularly inspect and maintain these components to ensure your living space remains healthy and welcoming for family and guests.
Start by locating all your room’s air vents and checking for any visible dust, debris, or blockages. You’ll want to remove the vent covers and vacuum both the openings and covers thoroughly. For optimal performance, replace or clean your HVAC filters according to the maintenance schedule.
| Task | Frequency | Tools Needed |
|---|---|---|
| Visual Inspection | Monthly | Flashlight |
| Vent Cover Cleaning | Quarterly | Vacuum, Damp Cloth |
| Filter Check | Monthly | None |
| Filter Replacement | 3-6 Months | New Filter |
Don’t forget to check for proper airflow by holding a piece of paper near each vent while your system’s running. If the paper doesn’t move or barely flutters, you might need professional duct cleaning. Remember, well-maintained vents and filters not only improve air quality but also help your HVAC system run more efficiently, saving you money on energy bills.
How to Speed Clean Your Living Room in 15 Minutes
Ever feel like your living room is one mess away from chaos—but you don’t have time to clean it properly? We’ve all been there. Whether it’s last-minute guests, a busy schedule, or just the need for a quick refresh, a messy living room doesn’t stand a chance when you know how to tackle it in 15 minutes.
With a few smart strategies and a sense of urgency, you can transform your space into a neat and inviting area in less time than it takes to watch your favorite TV show. That’s right—15 minutes is all you need to restore order and make your living room shine.
Don’t worry about spending hours or getting overwhelmed. This quick-clean method is all about efficiency, focus, and a little fun—because cleaning doesn’t have to be a chore! Let’s dive into how you can tackle your living room in no time at all!
Gather Supplies First

Before diving into your 15-minute cleaning sprint, gathering all necessary supplies in one convenient caddy or basket will save precious minutes of running back and forth. Think like a professional and keep your cleaning toolkit stocked and organized, ready to tackle any living room challenge.
Your essential supplies should include: microfiber dusting cloths, glass cleaner, all-purpose cleaner, furniture polish, a handheld vacuum or dust buster, garbage bags, and disinfecting wipes. Don’t forget to add a few extras that’ll make your cleaning more efficient, like a telescoping duster for high corners and an upholstery brush for stubborn pet hair.
Store your living room cleaning caddy in a nearby closet or cabinet where it’s easily accessible. You’ll feel more confident and prepared knowing everything’s within arm’s reach. Many experienced home cleaners also keep a few dryer sheets in their caddy – they’re perfect for quick dust removal from electronics and baseboards. Remember, when you’re organized and prepared like the pros, you’ll clean more efficiently and have more time to enjoy your freshly tidied space with family and friends.
Set a Timer and Play Music

Music and time management can transform your living room cleaning routine from a dreaded chore into an energizing 15-minute sprint. Set your timer to 15 minutes and create an upbeat playlist that’ll keep you motivated throughout the task. You’ll be amazed at how much you can accomplish when you’re racing against the clock while dancing to your favorite tunes.
Choose songs that match your cleaning pace – upbeat tracks will naturally make you move faster and stay focused. When you know you’ve got just 15 minutes, you won’t get distracted by your phone or other household tasks. Many cleaning enthusiasts swear by this method because it creates a sense of urgency while making the experience enjoyable.
- Create a dedicated “Speed Cleaning” playlist that’s exactly 15 minutes long, so you’ll know when to wrap up
- Pick high-energy songs with strong beats to maintain a quick cleaning pace
- Use wireless earbuds or a portable speaker so you can move freely around the room
Declutter Surfaces Quickly

Three key surfaces demand immediate attention in your 15-minute speed clean: coffee tables, side tables, and entertainment centers. Don’t waste precious time analyzing each item – instead, focus on quick decisions to clear these spaces effectively. Start by removing anything that doesn’t belong in the living room and putting it in a sorting basket for later distribution to proper locations.
- Remove dirty dishes, empty cups, and food items first – they’re the biggest culprits of living room clutter and can attract unwanted pests
- Stack magazines and books neatly, keeping only the current month’s issues and frequently read books within reach
- Gather remote controls, gaming controllers, and electronic accessories, placing them in their designated spots or an attractive storage box
Once you’ve cleared the main surfaces, quickly wipe them down with your cleaning cloth. Remember, you’re not aiming for perfection – just a tidy, welcoming space where family and friends can relax. Store everyday items like throw blankets and pillows in their proper places, and you’ll instantly transform your living room from cluttered to composed. This quick decluttering sets the stage for the deeper cleaning tasks ahead.
Dust and Tidy Key Areas
Quick dusting of essential areas in your living room requires a strategic approach to hit the most visible spots first. Start with a microfiber cloth and work top-to-bottom, focusing on surfaces at eye level where dust is most noticeable. You’ll want to tackle your TV screen, entertainment center, and any decorative shelving that draws immediate attention.
Move on to your coffee table, end tables, and lamp bases, making sure to lift and dust underneath any decorative items rather than just around them. Don’t forget window sills and picture frames – these areas often collect visible dust that your guests will notice. If you’ve got ceiling fans, use an extended duster to quickly sweep away buildup without spreading it everywhere.
For wood furniture, use appropriate cleaning products to maintain the finish while removing dust. Pay special attention to side tables where drinking glasses leave rings and coffee table surfaces that show fingerprints. Remember to dust electronics like gaming consoles, cable boxes, and speakers – they’re dust magnets that can affect your entertainment system’s performance. Finally, give baseboards a quick wipe in high-traffic areas where dust tends to settle.
Vacuum High-Traffic Spots
Strategic vacuuming of high-traffic areas delivers maximum impact when you’re short on time. Focus on the paths where family members and guests walk most frequently, as these spots collect the most dirt, pet hair, and debris. You’ll want to pay special attention to the areas around your seating arrangement and the main walkways that connect your living room to other spaces.
For a thorough clean of high-traffic zones, make sure you:
- Make multiple passes with your vacuum in different directions to lift embedded dirt and restore carpet fibers
- Target the transitions between flooring types, like where carpet meets hardwood, as debris tends to accumulate there
- Focus on the areas beneath and around coffee tables, where crumbs and dust often gather unnoticed
Don’t forget to move lightweight furniture slightly to reach hidden dirt patches. If you’ve got area rugs, give their edges extra attention since they tend to trap more debris than the center. Remember to adjust your vacuum’s height setting based on your flooring type – this ensures you’re getting the deepest clean possible in these frequently used spaces.
Living Room Cleaning Hacks and Tips
Strategic vacuuming of high-traffic areas delivers maximum impact when you’re short on time. Focus on the paths where family members and guests walk most frequently, as these spots collect the most dirt, pet hair, and debris. You’ll want to pay special attention to the areas around your seating arrangement and the main walkways that connect your living room to other spaces.
For a thorough clean of high-traffic zones, make sure you:
- Make multiple passes with your vacuum in different directions to lift embedded dirt and restore carpet fibers
- Target the transitions between flooring types, like where carpet meets hardwood, as debris tends to accumulate there
- Focus on the areas beneath and around coffee tables, where crumbs and dust often gather unnoticed
Don’t forget to move lightweight furniture slightly to reach hidden dirt patches. If you’ve got area rugs, give their edges extra attention since they tend to trap more debris than the center. Remember to adjust your vacuum’s height setting based on your flooring type – this ensures you’re getting the deepest clean possible in these frequently used spaces.
DIY Natural Cleaners for Furniture

Natural cleaning solutions can protect your furniture while keeping your living space free from harsh chemicals. You’ll love how these simple DIY cleaners effectively maintain your furniture without exposing your family to toxic ingredients. Making your own furniture cleaners isn’t just cost-effective – it’s also a smart way to ensure you know exactly what’s touching your cherished pieces.
For wooden furniture, mix equal parts olive oil and lemon juice to create a natural polish that nourishes and protects. If you’re dealing with fabric upholstery, combine water, white vinegar, and a few drops of essential oils for a refreshing deodorizer and cleaner. For leather furniture, mix two parts linseed oil with one part vinegar to condition and clean simultaneously.
- Wood Cleaner: 1/2 cup white vinegar + 1/4 cup olive oil + 10 drops lemon essential oil
- Fabric Refresher: 2 cups water + 1/4 cup vinegar + 5 drops lavender essential oil
- Leather Care: 1/4 cup coconut oil + 5 drops tea tree oil
Store your homemade cleaners in dark glass bottles and label them clearly. You’ll find these natural solutions work just as effectively as commercial products while being gentler on your furniture and the environment.
Quick Fixes for Stubborn Stains

When stubborn stains appear on your living room surfaces, quick action and the right treatment method can prevent permanent damage. For coffee spills on your carpet, blot the area with a mixture of white vinegar and water, then sprinkle baking soda over it. Let it sit for 15 minutes before vacuuming.
Red wine stains don’t stand a chance against club soda and salt. Pour the club soda directly on the stain, sprinkle salt over it, and gently work it into the fabric. For grease marks on upholstery, cover the spot with cornstarch or baby powder, wait 20 minutes, then vacuum thoroughly.
Ink stains on fabric respond well to rubbing alcohol – dab it on with a cotton swab, working from the outside toward the center. For wax drips on furniture, place a paper bag over the spot and run a warm iron over it; the wax will transfer to the paper. Sticky residue from tape or labels comes off easily with a mixture of equal parts coconut oil and baking soda. Just remember to test any cleaning solution on a small, hidden area first to ensure it won’t damage your surfaces.
Organizing Tips for Small Living Rooms

Beyond keeping surfaces clean and stain-free, maximizing space in a small living room can transform it into a more functional and organized area. You’ll want to focus on smart storage solutions and furniture placement that creates an open, inviting atmosphere while maintaining the room’s practicality.
Start by selecting multi-purpose furniture pieces that work double duty. A storage ottoman can serve as extra seating and hide blankets, while floating shelves maximize vertical space without consuming valuable floor area. Consider installing wall-mounted lighting instead of floor lamps to free up corner spaces.
Here are key strategies to keep your small living room organized:
- Use vertical storage solutions like tall bookcases or wall-mounted cabinets to draw the eye upward and create the illusion of higher ceilings
- Invest in furniture with hidden storage compartments, such as hollow coffee tables or sofas with under-seat storage
- Implement a “one-in-one-out” rule when adding new décor items to prevent clutter accumulation
Remember to periodically assess your space and remove items that don’t serve a purpose. This helps maintain the organization system you’ve established and keeps your living room feeling spacious and welcoming.
Conclusion
By following these simple cleaning steps, you’ve transformed your living room into a fresh, inviting space that’s not just visually appealing but also healthier for you and your loved ones. A well-maintained living room removes dust, allergens, and clutter—creating a peaceful sanctuary where you can truly relax.
But let’s be honest—keeping up with cleaning can be overwhelming, especially with a busy schedule. If you’d rather spend your time enjoying your home instead of constantly cleaning it, Tidy Upped is here to help!
Our expert cleaning team ensures your living room (and the rest of your home) stays spotless, so you can focus on what matters most—family, friends, and the moments that make life special. Whether you need a one-time deep clean or a recurring cleaning service, we’ll customize a plan that fits your needs and lifestyle.
Ready to enjoy a cleaner home without the stress? Let Tidy Upped take care of the cleaning for you. Book your professional cleaning service today and experience the difference!
Frequently Asked Questions
Check Out Our Recent Articles:
How Often Should You Deep Clean Your House?
Most people know they should deep clean their home — but when it comes to how often, the answer usually ranges from "probably not as often as I should" to "honestly, it's been a [...]

Pet-Safe Cleaning Products: What’s Safe for Dogs & Cats
If you share your home with a dog, a cat, or both, you already know that keeping things clean is a full-time project. But here's something that doesn't get talked about nearly enough: many of [...]
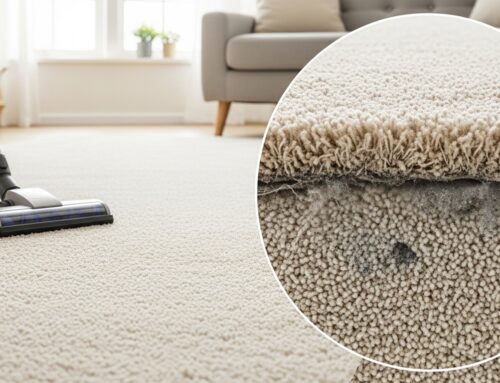
Carpet Cleaning vs. Vacuuming
You vacuum your carpets every week. You can see the difference — fresh vacuum lines, no visible debris, a tidier-looking home. So your carpets must be clean, right? Not quite. Here's the uncomfortable truth: [...]


Leave A Comment