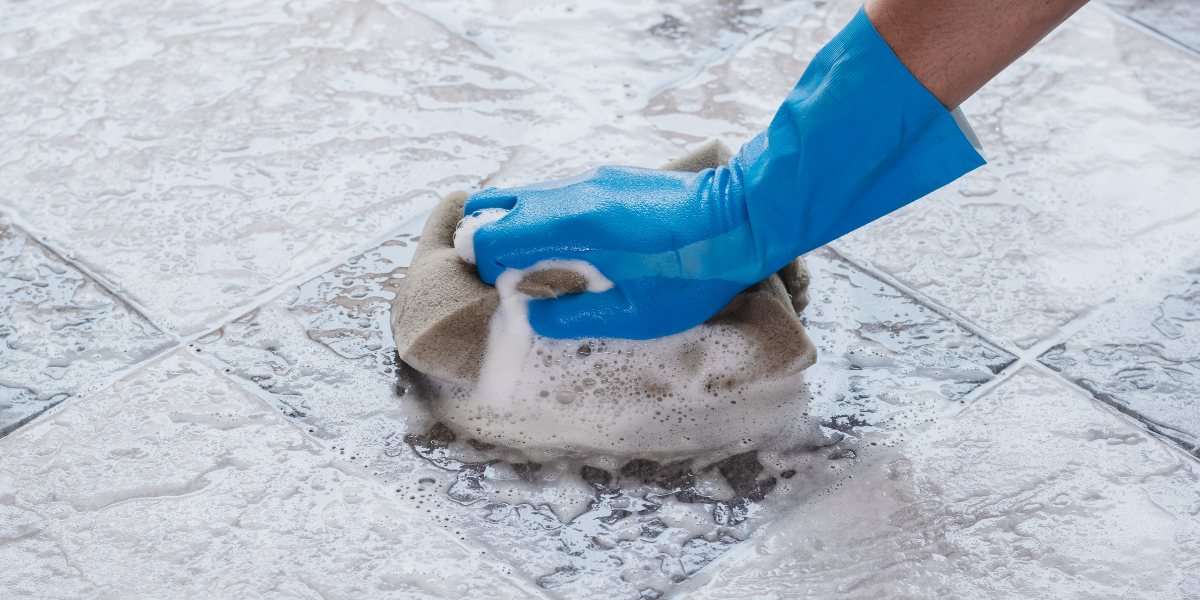
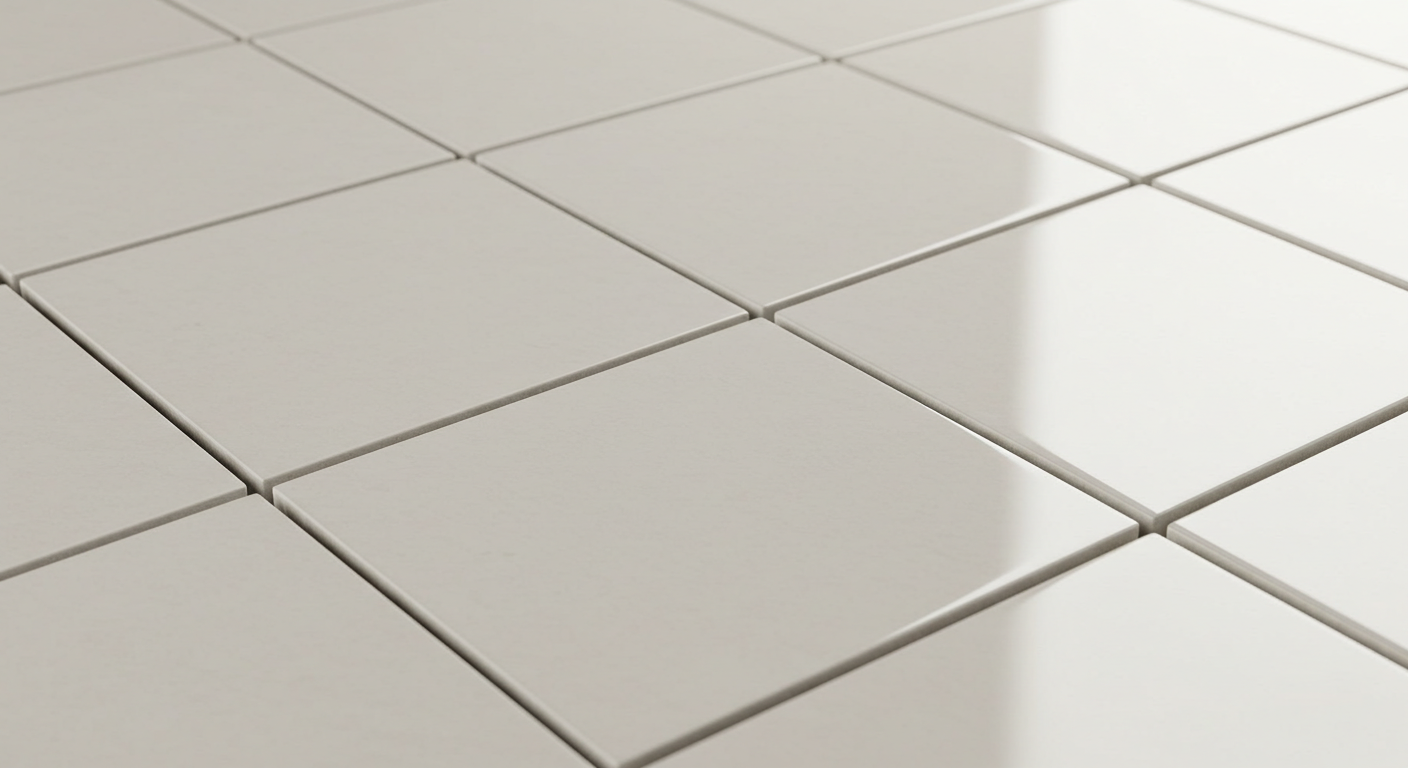
To clean porcelain tiles effectively, I start by sweeping or vacuuming to eliminate loose dirt and debris. I use a neutral pH cleaner with a microfiber mop for floors, while soft-bristle brushes help lift buildup from grout lines. For showers and wall tiles, a non-abrasive sponge works best to protect the finish. Professional cleaners—like those featured by Southern Living—often recommend sticking to gentle tools and consistent maintenance to keep bathroom tile looking new.
I avoid harsh chemicals and always rinse thoroughly to prevent residue from dulling the surface. After cleaning, I dry the tiles with a microfiber cloth or squeegee to prevent water spots and mineral buildup. There’s more to explore when it comes to preserving that fresh, polished look—and if you’d rather leave it to the pros, TidyUpped offers professional tile and home cleaning services in Allen, TX, and nearby areas.
Table of Contents
Key Takeaways
Before You Start: What Makes Porcelain Tile Unique
Before I start cleaning porcelain tiles, it’s crucial to understand what sets them apart from ceramic tiles.
I’ll also touch on common issues that arise from incorrect cleaning methods to help you avoid potential pitfalls.
Porcelain vs. Ceramic Tile – What’s the Difference?
While many people often confuse porcelain tiles with ceramic tiles, understanding their differences is vital for making informed decisions about flooring options. Both materials have their merits, but they serve different purposes.
| Feature | Porcelain Tile | Ceramic Tile |
| Water Absorption | Low (0.5% or less) | Higher (up to 3%) |
| Durability | More durable | Less durable |
| Use | Indoor & outdoor | Mostly indoor |
| Cleaning Recommendation | Porcelain tile cleaner | Mild soap & water |
Why Porcelain Requires Special Care?
Understanding why porcelain requires special care is essential for maintaining its unique properties.
Porcelain tiles are known for their durability and water resistance, making them a popular choice for various surfaces. However, their finish types can vary, influencing how we should approach cleaning.
Regular maintenance, including sealing if necessary, will help preserve their appearance and extend their lifespan.
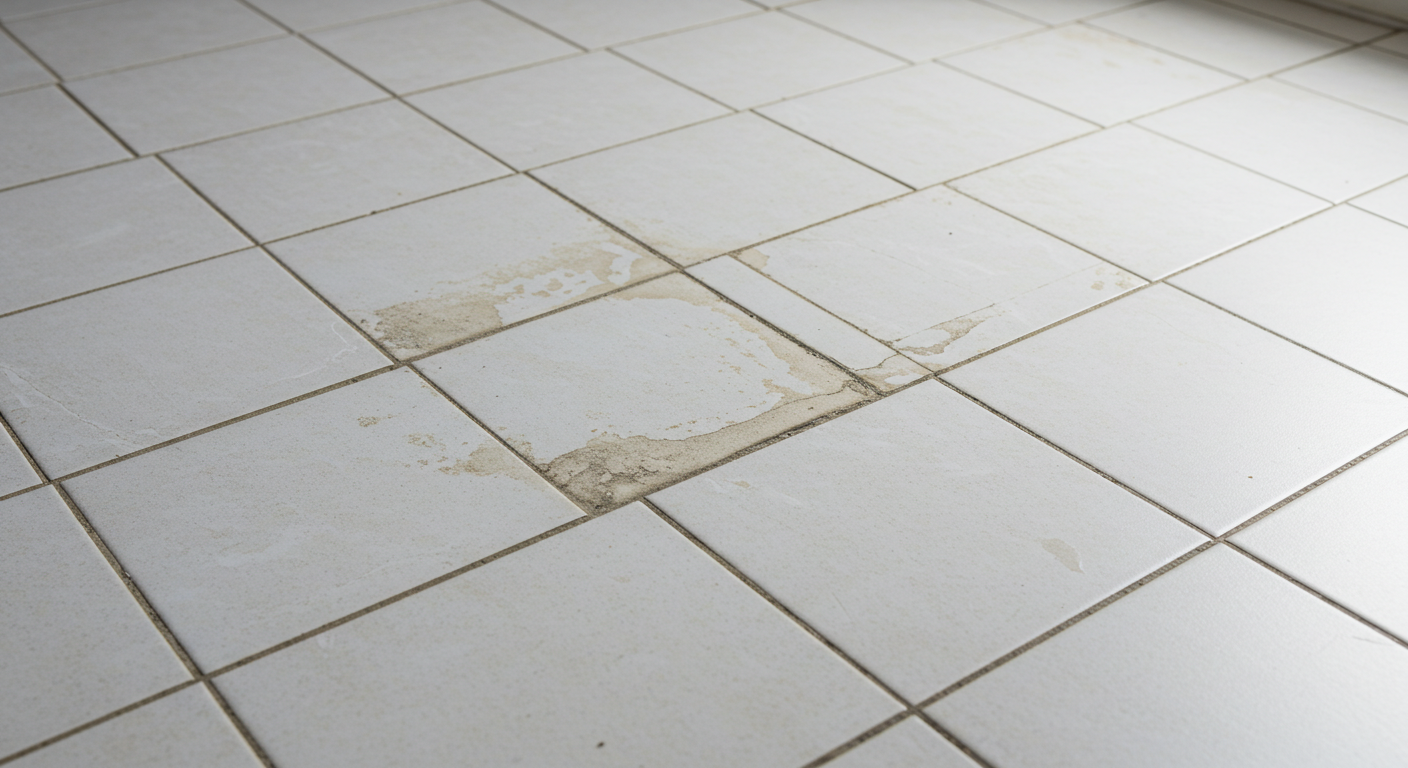
Common Problems When Cleaning Incorrectly
Cleaning porcelain tiles improperly can lead to a range of issues that compromise their beauty and longevity. One common mistake is using harsh chemicals that can etch the surface, leaving it dull and unappealing.
Additionally, neglecting to rinse thoroughly after using cleaning solutions can result in residue buildup, making it harder to maintain that pristine look. I’ve also noticed that using abrasive scrubbers can scratch the tile, diminishing its finish.
Inadequate drying can promote mold growth, especially in damp areas like showers.
Tools & Supplies You’ll Need for Porcelain Tile Cleaning
To effectively clean your porcelain tiles, you’ll need the right tools and supplies.
Recommended Cleaners (Neutral pH, Non-Acidic)
When it comes to maintaining the beauty of porcelain tiles, selecting the right cleaners is essential. The best cleaner for porcelain tile floors should be neutral pH and non-acidic, guaranteeing it won’t damage the tile’s surface or grout.
I recommend using a specially formulated porcelain tile floor cleaner that effectively removes dirt and stains without leaving harsh residues. Look for products that specify they’re safe for porcelain and avoid those with bleach or acidic components.
Best Tools for Floors vs. Showers vs. Textured Surfaces
Selecting the right tools is just as important as choosing the right cleaner for porcelain tile surfaces.
| Tool | Best Used For | Why It’s Recommended |
| Microfiber mop | Porcelain tile floors | Lifts dirt without scratching delicate surfaces |
| Bucket | All tile cleaning tasks | Ideal for mixing and transporting cleaning solutions |
| Non-abrasive sponge | Porcelain tile showers, walls | Gentle yet effective on smooth tile surfaces |
| Soft-bristle brush | Grout lines, textured tiles | Scrubs without damaging tile or grout |
| Squeegee | Shower walls, glass, tile | Prevents streaks and water spots |
| Nylon brush | Deep-cleaning textured or outdoor porcelain tiles | Reaches into crevices and uneven tile surfaces |
Safety Tips: Ventilation, Gloves, Test Spots
Guaranteeing safety while cleaning porcelain tiles is essential, especially when using chemical cleaners. I always recommend taking proper precautions to protect yourself and your space.
Here are some safety tips I follow:
- Guarantee proper ventilation by opening windows and doors.
- Wear gloves to protect your skin from harsh chemicals in your cleaner for porcelain tile.
- Use a mask if you’re sensitive to fumes.
- Always test a small, inconspicuous area before applying any cleaner to the entire surface.
- Keep pets and children away from the cleaning area until it’s completely dry.
Step-by-Step: How to Clean Porcelain Tile Floors
To clean porcelain tile floors effectively, I follow a straightforward process that guarantees deep cleanliness:
Step 1: Sweep or Vacuum Thoroughly
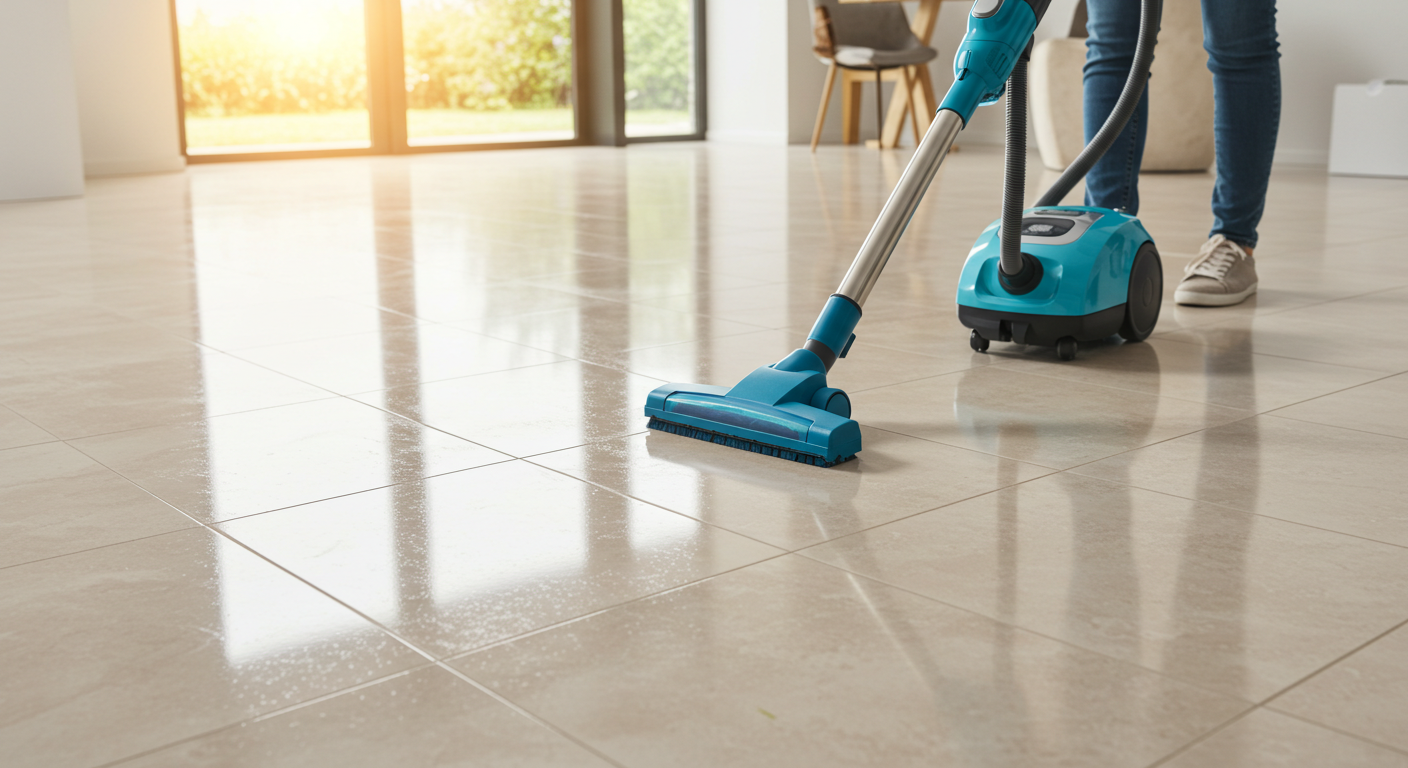
Before diving into deep cleaning your porcelain tiles, I always recommend starting with a thorough sweep or vacuum. This initial step is essential for removing loose dirt and debris, preventing scratches during the cleaning process.
Here’s how I do it:
- Use a soft-bristle broom or a vacuum with a hard floor attachment.
- Focus on corners and edges where dirt tends to accumulate.
- Pay special attention to high-traffic areas for the best results.
- Check for any stubborn particles that may require extra attention.
- Make sure your cleaning tools are clean to avoid transferring dirt back onto the tiles.
Step 2: Mop with a Neutral Cleaner
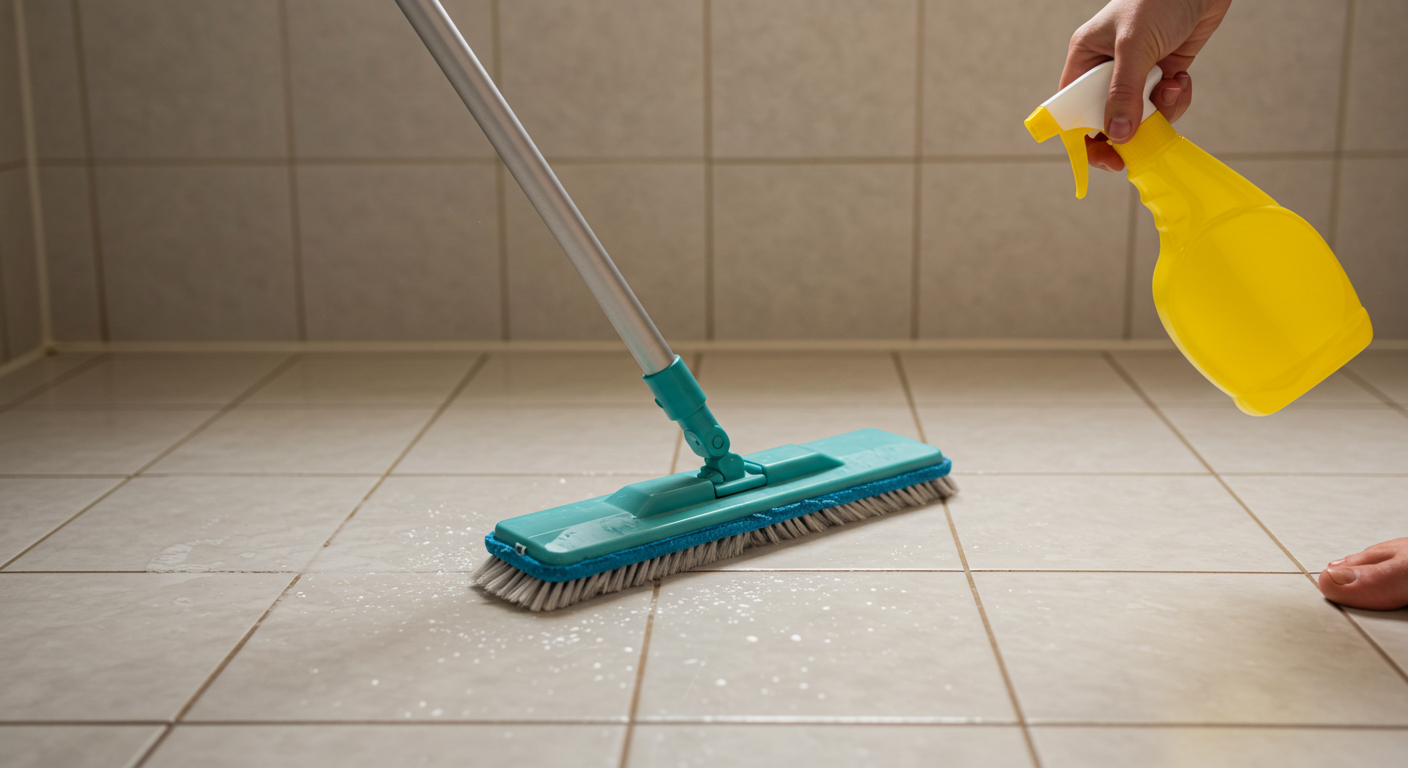
After you’ve swept or vacuumed the tiles, it’s time to mop using a neutral cleaner specifically formulated for porcelain surfaces.
I recommend choosing a cleaner that’s pH-balance.. Dilute the cleaner according to the manufacturer’s instructions for best results.
Using a microfiber mop, start in a corner and work your way toward the exit, applying even pressure. Make sure to rinse the mop frequently to avoid spreading dirt.
For outdoor porcelain tiles, an outdoor porcelain tile cleaner is essential, as it effectively removes grime and mildew accumulated from weather exposure.
Step 3: Focus on Grout Lines

While mopping the tiles is essential, neglecting the grout lines can lead to a dull and dirty appearance.
To effectively clean your grout lines, I recommend following these steps:
- Gather your tools: You’ll need a stiff brush, a bucket, and a suitable grout cleaner.
- Apply the cleaner: Use the grout cleaner according to the manufacturer’s instructions, allowing it to sit briefly.
- Scrub the grout: With the stiff brush, gently scrub the grout lines to lift dirt and stains.
- Wipe away residue: Use a damp cloth or sponge to remove any remaining cleaner from the tiles and grout.
- Inspect your work: Check for any remaining stains, and repeat the process if necessary.
This focused approach will revitalize your tiles and enhance the overall appearance of your space.
Step 4: Rinse with Clean Water
Once you’ve scrubbed the grout lines and removed dirt and stains, it’s important to rinse the tiles thoroughly.
I recommend using a clean mop or cloth and fresh water to eliminate any cleaning solution residue. Start at one corner of the room and work your way across to avoid stepping on wet areas.
Dip your mop or cloth into the water, wring it out, and then wipe down the tiles in a consistent, overlapping motion. Make sure to change the water frequently to maintain cleanliness.
This step guarantees that no soap or grime is left behind, allowing the tiles to shine and keeping the surface safe for foot traffic. Rinse well to achieve the best results.
Step 5: Dry Completely to Prevent Water Spots
To guarantee your porcelain tiles look pristine and avoid unsightly water spots, it’s crucial to dry them completely after rinsing.
I recommend using these techniques for effective drying:
- Microfiber Cloths: These are highly absorbent and won’t scratch your tiles.
- Squeegee: A squeegee helps remove excess water quickly and efficiently.
- Fan or Dehumidifier: Use a fan or dehumidifier to promote airflow and speed up drying.
- Towel Technique: For stubborn areas, lay a dry towel and gently press to absorb moisture.
- Check for Residual Water: After drying, inspect the tiles for any remaining water spots to guarantee a thorough job.
Specialized Techniques for Different Porcelain Tile Finish
When it comes to cleaning porcelain tiles, each type requires a specific approach.
I’ll guide you through the best techniques for polished or glazed tiles, unpolished or matte finishes, and textured tiles with deep grooves.
Polished or Glazed Porcelain
Polished or glazed porcelain tiles require specific cleaning techniques to maintain their luster and protect their surface.
Here’s how I guarantee they stay pristine:
- Use a pH-neutral cleaner to avoid damaging the finish.
- Mop with a microfiber cloth to prevent scratching.
- Avoid abrasive scrubbers, which can mar the surface.
- Rinse thoroughly to remove any cleaner residue.
- Dry the tiles promptly to prevent water spots.
Unpolished or Matte Finish
While polished or glazed porcelain tiles demand careful maintenance to preserve their shine, unpolished or matte finish tiles present a different set of cleaning challenges.
With these tiles, I find it essential to use a pH-neutral cleaner, as harsh chemicals can cause discoloration. Start by sweeping or vacuuming the surface to remove dirt and debris.
Then, mix the cleaner with warm water and apply it using a soft mop or cloth, avoiding abrasive tools that could scratch the surface. After cleaning, rinse with clean water to remove any residue.
For tough stains, a mixture of baking soda and water can work wonders. Regular maintenance not only enhances the tile’s appearance but also prolongs its lifespan, ensuring it stays beautiful for years.
Textured Porcelain Tile – How to Clean Deep Grooves

Cleaning textured porcelain tiles, especially those with deep grooves, requires a specific approach to guarantee you effectively remove dirt and grime.
Here’s how I tackle this challenge:
- Use a soft-bristle brush: This helps reach into deep grooves without scratching the surface.
- Choose a pH-neutral cleaner: It’s gentle yet effective for deep cleaning.
- Apply the solution generously: Confirm it seeps into the grooves for better dirt removal.
- Scrub in circular motions: This technique dislodges embedded debris effectively.
- Rinse thoroughly with warm water: Verify no cleaner residue remains, which can attract more dirt.
How to Clean and Restore Grout Lines
Cleaning and restoring grout lines is essential for maintaining the overall appearance of your porcelain tiles.
I’ll guide you through the best DIY and store-bought cleaners, when to reseal or restore your grout, and what to avoid, like harsh chemicals and metal brushes.
Let’s guarantee your grout looks as good as new.
Best Cleaners for Grout (DIY & Store-Bought)

Have you ever wondered how to effectively tackle those stubborn grout lines that seem to collect dirt and grime over time?
I’ve found that choosing the right cleaner can make all the difference. Here are some of my go-to options for both DIY and store-bought solutions:
- Baking Soda and Vinegar: A powerful natural combo for tough stains.
- Hydrogen Peroxide: Effective for whitening and disinfecting.
- Oxygen Bleach: A safe choice for deep cleaning without harming surfaces.
- Commercial Grout Cleaners: Look for those specifically designed for porcelain tiles.
- Steam Cleaners: Great for sanitizing and loosening grime without chemicals.
With these cleaners, you’ll be well-equipped to restore your grout lines to their original brilliance!
When to Reseal or Restore
When should you consider resealing or restoring your grout lines? I recommend taking action when you notice discoloration, stains, or a rough texture.
Typically, resealing should occur every 1 to 2 years, depending on foot traffic and humidity levels. If your grout appears cracked or crumbling, it’s time to restore it.
Begin by cleaning the surface thoroughly to remove any debris and grime. After that, apply a high-quality grout sealer to protect against moisture and stains.
For deeper restoration, consider using a grout stain or epoxy filler, especially in high-traffic areas. Keeping your grout in top shape not only enhances the appearance of your tiles but also extends their lifespan, ensuring your hard work serves others well.
What to Avoid
Maintaining the integrity of your grout lines is just as important as the initial cleaning process.
To guarantee your grout remains strong and visually appealing, there are certain things I recommend avoiding:
- Harsh chemicals: They can degrade grout and tiles over time.
- Metal brushes: These can scratch and damage the surface.
- Excessive water: Over-saturating can lead to mold and mildew growth.
- Vinegar or acidic cleaners: These can erode grout and tile finishes.
- Neglecting regular maintenance: This leads to deeper stains and damage.
How to Clean Porcelain Outdoor Tile & Shower Walls
Porcelain tile is tough, water-resistant, and incredibly versatile — making it ideal for everything from shower walls to outdoor patios. But while indoor porcelain tile floors mainly deal with foot traffic, dust, and spills, outdoor tiles face the elements, and shower walls battle daily moisture, soap scum, and mildew. Each environment presents unique cleaning challenges. Here’s how to clean these surfaces effectively without damaging the tile or grout:
Cleaning Porcelain Shower Walls

Shower walls are exposed to daily moisture, soap scum, body oils, and mildew — not foot traffic. They’re also harder to rinse and dry due to vertical placement.
Tools & Products:
- Non-abrasive sponge or microfiber cloth
- Soft-bristle brush (for grout and corners)
- Neutral pH tile cleaner or warm water + dish soap
- Spray bottle (optional)
- Squeegee or dry towel
Steps:
- Spray the tile with a cleaner and let it sit for 3–5 minutes.
- Gently scrub with a sponge or brush, paying attention to corners and grout.
- Rinse thoroughly with clean water.
- Dry the surface with a squeegee or microfiber towel to prevent water spots.
Tips:
- Use a daily shower spray to reduce buildup.
- Always ventilate after use to prevent mold and mildew.
- Avoid vinegar or acidic cleaners on unglazed or matte porcelain finishes.
Cleaning Outdoor Porcelain Tile
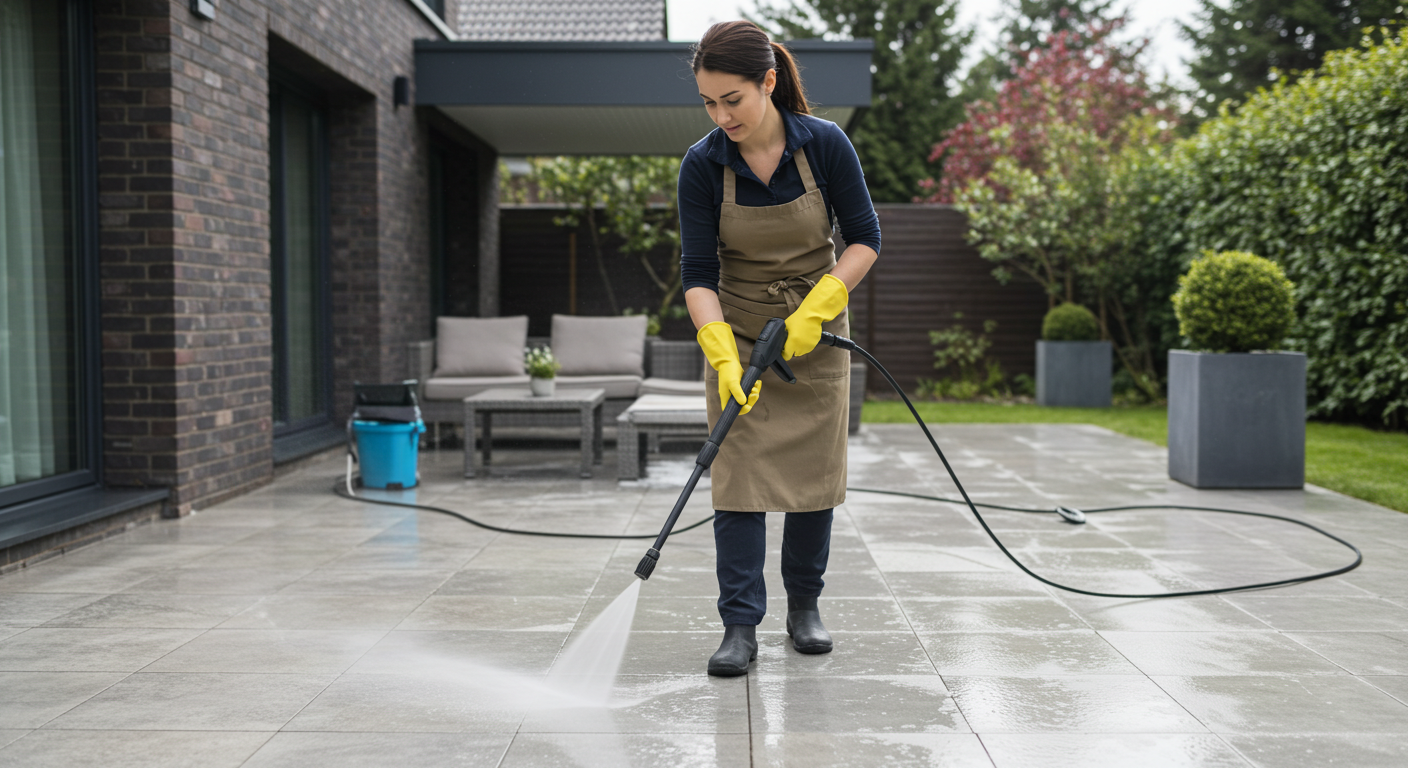
Outdoor tiles face exposure to dirt, leaves, mud, rain, and even mold or algae. You’ll need to remove organic debris and environmental stains, which are not common indoors.
Tools & Products:
- Stiff outdoor broom or leaf blower
- Garden hose or pressure washer (use with care)
- Porcelain-safe outdoor tile cleaner or mild detergent
- Nylon scrub brush or push broom
- Bucket (for mixing cleaning solution)
Steps:
- Sweep or rinse loose debris using a broom or hose.
- Apply cleaning solution and let it sit for 5–10 minutes.
- Scrub the surface with a nylon brush or push broom.
- Rinse thoroughly with clean water — pressure washer on low setting if needed.
- Allow to air dry, or use a mop for quicker drying.
Tips:
- Avoid bleach or acid-based cleaners, which can discolor grout.
- If using a pressure washer, keep the nozzle at a safe distance (at least 12 inches).
- Seal grout lines if they’re exposed to prevent moisture infiltration and staining.
Tidy Upped Tip:
“Porcelain may be tough, but proper care varies by environment. Shower tiles need moisture control; outdoor tiles need stain and debris management. Treat them like two different surfaces — because they are.”
How To Deal with Tough Stains & Disinfection
When it comes to dealing with tough stains on porcelain tiles, I focus on identifying the specific type of stain, whether it’s rust, grease, or wine.
I also make certain to use safe disinfectants that won’t damage the surface while effectively removing any residue.
Finally, I tackle any hazy film or etching to restore the tiles to their original shine.
Removing Rust, Grease, or Wine Stains
Although porcelain tiles are durable, they can still fall victim to tough stains like rust, grease, or wine, which can be tricky to remove.
Here’s how I tackle these stubborn stains effectively:
- Rust: Apply a paste of baking soda and water, let it sit, then scrub gently.
- Grease: Use a mixture of dish soap and warm water; scrub with a soft cloth or sponge.
- Wine: Blot the stain immediately with a paper towel, then treat with a mix of hydrogen peroxide and dish soap.
- Rinse: Always rinse with clean water after treatment to avoid residue.
- Dry: Wipe the area dry with a microfiber cloth to prevent new stains.
These methods will keep your porcelain tiles looking pristine and welcoming.
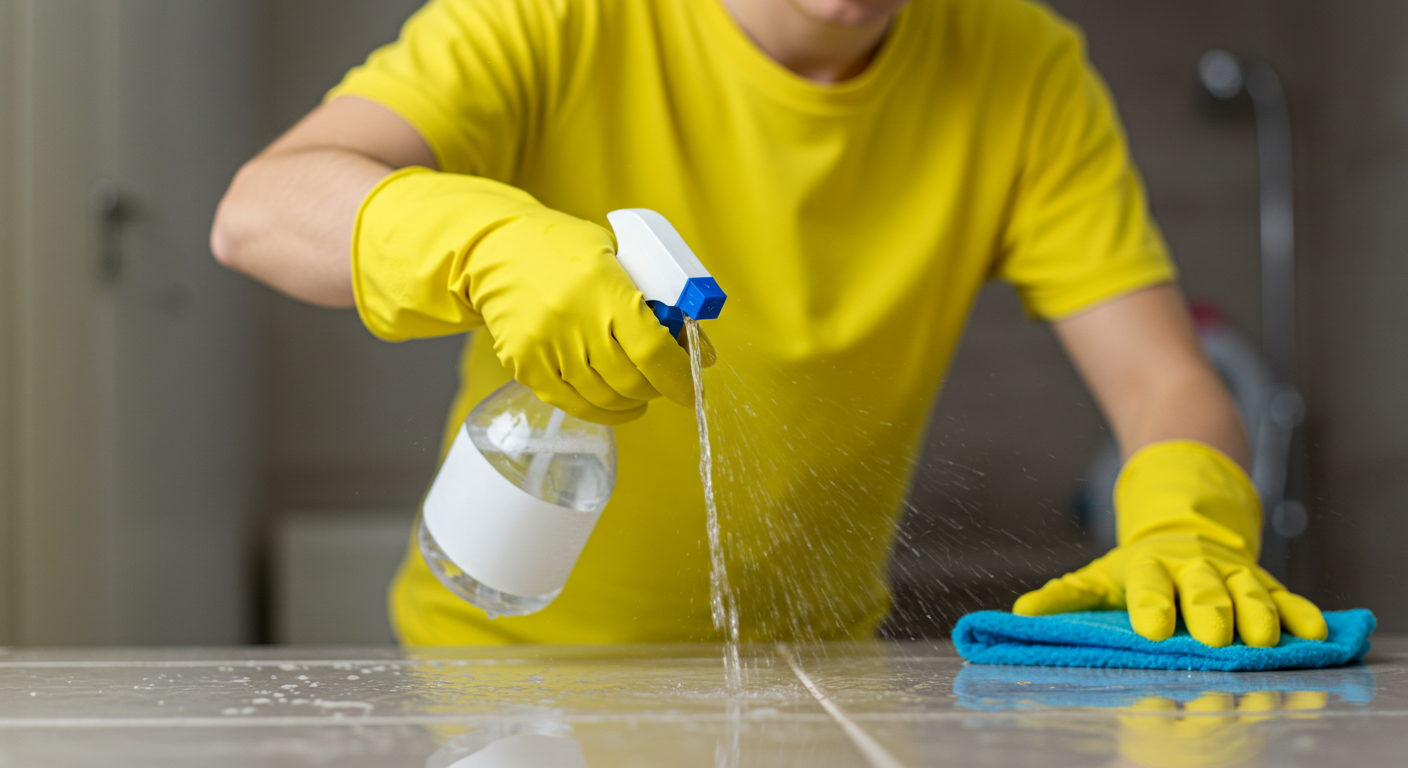
Safely Disinfecting Porcelain Without Damage
After tackling tough stains like rust, grease, and wine, it’s important to focus on disinfecting porcelain tiles without causing damage.
I recommend using a diluted solution of white vinegar and water, as it effectively kills germs while being gentle on porcelain. Mix equal parts in a spray bottle, then spray the solution directly onto the tiles. Let it sit for five minutes to work its magic.
Next, use a soft cloth or sponge to wipe the surface, ensuring you don’t scrub too hard to avoid scratches.
Rinse with clean water to remove any residue, and dry with a microfiber cloth. This method keeps your tiles sanitary and helps maintain their shine, ensuring they look great for your guests.
How to Remove Hazy Film or Etching
To effectively remove a hazy film or etching from your porcelain tiles, I’ve found that using a specialized tile cleaner or a mixture of baking soda and water can yield excellent results.
Here’s how I tackle the issue:
- Mix equal parts of baking soda and water to form a paste.
- Apply the paste directly onto the affected area with a soft cloth or sponge.
- Gently scrub in a circular motion to lift the haze.
- Rinse the tiles thoroughly with warm water to remove any residue.
- Dry with a clean cloth to prevent water spots.
This method not only restores the shine but also minimizes the risk of damage.
With a little patience, your tiles will look as good as new!
Common Mistakes to Avoid When Cleaning Porcelain Tile
When cleaning porcelain tiles, I’ve noticed that many people make critical mistakes that can damage their surfaces.
Let’s explore these common pitfalls to guarantee your tiles stay in pristine condition.
Products That Damage Porcelain
While cleaning porcelain tiles might seem straightforward, using the wrong products can cause irreversible damage.
I’ve seen many homeowners unintentionally ruin their beautiful tiles by reaching for common household cleaners. Here are products you should avoid:
- Vinegar: Its acidity can etch and dull the surface.
- Bleach: This can lead to discoloration and damage the grout.
- Abrasive cleaners: Scrubbing pads or powders can scratch the tile.
- Ammonia-based cleaners: These can harm the finish and grout integrity.
- Oil-based products: They can leave a residue that attracts dirt.
Always opt for pH-neutral cleaners specifically designed for porcelain.
Protecting your investment means choosing wisely!
Improper Mopping Techniques
Even the best cleaning products can’t compensate for poor mopping techniques, which can lead to streaks and grime buildup on your porcelain tiles.
First, make sure you’re using a microfiber mop rather than a traditional sponge mop; the latter can trap dirt and leave residues.
When mopping, always follow a figure-eight pattern. This method lifts dirt without pushing it around.
Avoid soaking the tiles—excess water can seep into grout and cause damage. Instead, dampen the mop, wring it out thoroughly, and work in sections.
Remember to change your mop water frequently; dirty water will only spread grime.
Finally, don’t forget to maintain consistent pressure; too light will leave streaks, while too heavy can scratch the surface.
Forgetting to Rinse or Dry
If you neglect to rinse or dry your porcelain tiles after cleaning, you risk leaving behind a film that can dull their shine and attract dirt.
I’ve learned the hard way that this oversight can lead to unsightly tiles and extra work later. To avoid this mistake, consider the following steps:
- Always use fresh, clean water for rinsing.
- Employ a microfiber cloth or mop for ideal absorption.
- Dry tiles thoroughly with a clean towel or dry mop.
- Check for streaks or residue before finishing.
- Schedule regular maintenance to keep tiles pristine.
How Often Should You Clean Porcelain Tiles?
When it comes to cleaning porcelain tiles, establishing a regular schedule is essential.
I recommend evaluating your environment for signs that indicate a need for a deep clean, especially during seasonal changes when mud, salt, or pool water can accumulate.
Recommended Cleaning Schedules
How frequently should you clean your porcelain tiles to maintain their pristine condition?
I recommend establishing a cleaning schedule tailored to the areas of your home. Here’s a straightforward guide:
- Daily: Sweep or vacuum to remove debris and dirt.
- Weekly: Mop with a pH-neutral cleaner to prevent buildup.
- Monthly: Inspect grout lines and clean if necessary to maintain hygiene.
- Seasonally: Deep clean your tiles, focusing on high-traffic areas.
- As needed: Address spills and stains immediately to prevent permanent marks.
Signs It’s Time for a Deep Clean
Are you noticing a lackluster appearance or stubborn stains on your porcelain tiles? It’s likely time for a deep clean.
Pay attention to discoloration, especially in high-traffic areas, as this indicates accumulated dirt and grime. If your tiles seem slippery or have a dull finish despite regular cleaning, that’s another sign you shouldn’t ignore.
Additionally, check the grout lines; darkened or stained grout suggests that dirt has penetrated. I recommend deep cleaning at least every six months, or sooner if you see these signs.
Regular maintenance helps prolong the life of your tiles and keeps them looking pristine. Don’t hesitate to consult a professional service like Tidy Upped for thorough cleaning, ensuring your tiles shine and maintain their integrity.
Seasonal Considerations
In the changing seasons, various elements like mud, salt, and pool water can greatly impact the cleanliness and appearance of your porcelain tiles.
To maintain their pristine condition, I recommend cleaning them more frequently during these times. Here’s what to keep in mind:
- Mud: Wipe it off promptly to prevent stains.
- Salt: Rinse tiles regularly during winter to avoid residue buildup.
- Pool Water: Clean spills immediately to prevent slippery surfaces.
- Humidity: Increase cleaning frequency in humid months to combat mildew.
- Foot Traffic: More guests may require extra cleanings, especially after outdoor activities.
Pro Tips to Keep Porcelain Tile Looking New
To keep your porcelain tiles looking new, I recommend a few key strategies.
Entryway Mats and Dirt Prevention
While it might seem simple, placing entryway mats strategically can greatly reduce the dirt and debris entering your home, helping to keep your porcelain tiles looking pristine.
Here’s how I recommend implementing this effective prevention method:
- Choose high-quality mats: Opt for mats that trap dirt and moisture effectively.
- Position mats at every entrance: Place them at doors leading to the outside and from garages.
- Select appropriate sizes: Make sure mats are large enough for multiple people to wipe their feet simultaneously.
- Use non-slip mats: This prevents accidents while keeping the mats in place.
- Regularly clean the mats: Shake them out or wash them frequently to maintain their effectiveness.
Sealing Grout for Long-Term Protection
Sealing grout is essential for maintaining the beauty and longevity of your porcelain tiles, especially since unsealed grout can absorb stains and moisture.
To begin, choose a high-quality grout sealer specifically designed for your tile type. I recommend applying the sealer at least once a year, or more frequently in high-traffic areas.
Before sealing, confirm the grout is clean and dry. Simply use a sponge to apply the sealer evenly, making sure to cover all joints. Allow it to penetrate for the recommended time, then wipe away any excess.
This step creates a protective barrier, preventing dirt and stains from settling in. By sealing your grout, you’re investing in the long-term appeal and durability of your porcelain tiles.
When to Call a Professional
How can you tell when it’s time to call in a professional for your porcelain tile maintenance?
I’ve found that certain signs indicate it’s best to let the experts handle it. Here are some key indicators:
- Persistent stains that won’t lift with regular cleaning
- Grout discoloration or damage that affects the tile’s appearance
- Cracked or chipped tiles that require replacement
- Mold or mildew that’s difficult to eradicate
- A lack of time or tools to perform a thorough clean
If you notice any of these issues, it’s wise to reach out for professional help.
They’ve the expertise and equipment necessary to restore your porcelain tiles, ensuring they maintain their beauty and durability for years to come.
[Do you live in Allen, TX or nearby? Let Tidy Upped take care of your floors. Contact us here.]
Frequently Asked Questions
Can I Use Vinegar to Clean Porcelain Tiles?
I wouldn’t recommend using vinegar on porcelain tiles. Its acidity can damage the finish over time. Instead, I suggest using a pH-neutral cleaner specifically designed for porcelain to guarantee longevity and maintain its beauty.
How Do I Remove Scratches From Porcelain Tiles?
To remove scratches from porcelain tiles, I recommend using a fine-grit sandpaper gently, followed by a polishing compound. This method smooths the surface, restoring the tiles’ shine without damaging them. Always test in an inconspicuous area first.
Is Steam Cleaning Safe for Porcelain Tiles?
Yes, I find steam cleaning safe for porcelain tiles. It effectively removes dirt and grime without harsh chemicals. Just guarantee the steam isn’t too intense, as excessive heat can damage the grout or finish.
What Products Should I Avoid on Porcelain Tiles?
I’d avoid acidic cleaners, abrasive scrubs, and bleach on porcelain tiles. These can damage the surface and lead to dullness. Instead, use pH-balanced cleaners to maintain their shine and integrity while ensuring a safe environment.
Can Porcelain Tiles Be Waxed for Added Shine?
I wouldn’t recommend waxing porcelain tiles. Wax can create a slippery surface and trap dirt. Instead, I suggest using a pH-neutral cleaner to maintain their shine without compromising safety or cleanliness in your home.
Conclusion
To sum up, keeping your porcelain tiles looking pristine is entirely achievable with the right techniques and tools. By following the steps outlined for cleaning floors, showers, and grout, you can maintain their elegance and durability. Remember to clean regularly and use the appropriate products for your specific tile type. With consistent care, your porcelain tiles will remain a stunning feature of your home for years to come. Don’t hesitate to reach out if you have any questions!
Leave A Comment